First steps with the FINAL CUT widget toolkit
=============================================
Table of Contents
-----------------
- [Basic functions](#basic-functions)
- [Widgets](#widgets)
- [Widget tree](#widget-tree)
- [How to use the library](#how-to-use-the-library)
- [Memory Management](#memory-management)
- [Event Processing](#event-processing)
- [Event handler reimplementation](#event-handler-reimplementation)
- [Event types](#available-event-types)
- [Timer event](#using-a-timer-event)
- [User event](#using-a-user-event)
- [Signals and Callbacks](#signals-and-callbacks)
- [Default signals](#the-final-cut-widgets-emit-the-following-default-signals)
- [Callback function](#example-of-a-callback-function)
- [Callback lambda expression](#example-of-an-lambda-expression-callback)
- [Callback method](#example-of-a-callback-function)
- [Custom signals](#send-custom-signals)
- [Widget layout](#widget-layout)
- [Coordinates](#coordinates)
- [Lengths](#lengths)
- [Areas](#areas)
- [Dynamic layout](#dynamic-layout)
- [Scroll view](#scroll-view)
Basic functions
---------------
FINAL CUT is a library for creating text-based terminal applications.
It runs on several Unix-like platforms. The release of FINAL CUT is
licensed under the terms of the GNU Lesser General Public License v3.0
([GNU LGPL v3](https://www.gnu.org/licenses/lgpl-3.0-standalone.html)),
which allows flexible licensing of applications. FINAL CUT was written
in the programming language [C++](https://en.wikipedia.org/wiki/C%2B%2B).
The object-oriented design allows the creation of fast and lean programs.
FINAL CUT is a [widget toolkit](http://en.wikipedia.org/wiki/Widget_toolkit).
A user interface usually consists of several
[widgets](https://en.wikipedia.org/wiki/Software_widget). FINAL CUT
draws widgets on virtual windows and then mapped them on a virtual
terminal. It uses the terminal capabilities from the
[Termcap library](https://en.wikipedia.org/wiki/Termcap) to display
the character matrix of the virtual terminal on the screen or a terminal
emulator. It uses various optimization methods to improve the drawing speed.
Figure 1. Structure of a FINAL CUT application
Widgets
-------
FINAL CUT has many widgets. It offers buttons, input fields, menus, and
dialog boxes that cover the most common use cases. Widgets are visual
elements that are combined to create user interfaces. Own widgets can be
easily created by creating a derived class of `FWidget` or other existing
widgets. All widgets are instances of
[FWidget](https://codedocs.xyz/gansm/finalcut/classfinalcut_1_1FWidget.html)
or its subclasses.
A widget can contain any number of child widgets. Child widgets are displayed
in the display area of the parent widget. Window widgets based on `FWindow`
have their own virtual display area and are independent of the parent widget.
When a parent widget is disabled, hidden, or deleted, the same operation is
used recursively to all its child widgets. The base class `FObject` implements
the self-organized object tree behavior. For example, `addChild()` removes
the child ownership from an existing parent object before assigning it to
the new target. When a child becomes deleted, the parent-child relationship
causes its reference in the parent object to be removed. An explicit
`delChild()` is no longer required here.
Widget tree
-----------
An `FApplication` widget is the top-level widget of an application. It is
unique and can not have a parent widget. The class `FApplication` manages
all settings and assigns keyboard and mouse input to the different widgets.
Figure 2. Widget tree of a FINAL CUT application
The main widget of a FINAL CUT application is the only object that
`FApplication` can have as a child. This main widget is usually a window
object that contains all sub-widgets of the application. A sub-widget can
also be another window.
How to use the library
----------------------
At the beginning of this introduction to the FINAL CUT
we will start with a small example.
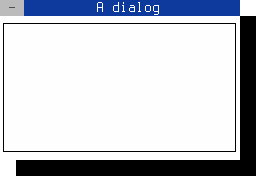
The following example creates an empty 30×10 character dialog.
**File:** *dialog.cpp*
```cpp
#include
int main (int argc, char* argv[])
{
finalcut::FApplication app(argc, argv);
finalcut::FDialog dialog(&app);
dialog.setText ("A dialog");
const finalcut::FPoint position{25, 5};
const finalcut::FSize size{30, 10};
dialog.setGeometry (position, size);
finalcut::FWidget::setMainWidget(&dialog);
dialog.show();
return app.exec();
}
```
Figure 3. A blank dialog
*(Note: You can close the dialog with the mouse,
Shift+F10 or Ctrl+^)*
After entering the source code in *dialog.cpp* you can compile
the above program with gcc:
```bash
g++ dialog.cpp -o dialog -O2 -lfinal
```
How it works
------------
```cpp
#include
```
All final cut programs must include the *final.h* header.
```cpp
finalcut::FApplication app(argc, argv);
```
This line creates the `finalcut::FApplication` object `app` with
the command line arguments `argc` and `argv`. This object manages
the application main event loop. It receives keyboard and mouse events
and sends them to the target widgets. You must create an application
object before you can create a widgets object.
The next line
```cpp
finalcut::FDialog dialog(&app);
```
creates the `finalcut::FDialog` object `dialog` with the object `app`
as parent object. The `finalcut::FDialog` class is the base class for
creating dialog windows.
```cpp
dialog.setText ("A dialog");
```
The title bar of the dialog box gets the text "A dialog".
```cpp
finalcut::FPoint position{25, 5};
finalcut::FSize size{30, 10};
dialog.setGeometry (position, size);
```
The dialog window gets a width of 30 and a height of 10 characters.
The position of the window in the terminal is at x=25 and
y=5 (note: x=1 and y=1 represents the upper left corner).
```cpp
finalcut::FWidget::setMainWidget(&dialog);
```
The `dialog` object was now selected as the main widget for the application.
When you close the main widget, the entire application quits.
```cpp
dialog.show();
```
A window or widget is not visible directly after its creation.
Only the call of `show()` makes it (and its child objects,
if available) visible.
```cpp
return app.exec();
```
The last line calls `exec()` to start the application and return
the result to the operating system. The started application enters
the main event loop. This loop does not end until the window is
not closed.
Memory Management
-----------------
To create a hierarchy of FObjects (or derived classes/widgets),
a new FObject must initialize with its parent object.
```cpp
FObject* parent = new FObject();
FObject* child = new FObject(parent);
```
To deallocate the used memory of a parent FObject, the allocated memory
of its child objects will also automatically deallocate.
An object can also be assigned to another object later via `addChild()`.
```cpp
FObject* parent = new FObject();
FObject* child = new FObject();
parent->addChild(child);
```
The child object assignment can also remove at any time with
`delChild()`.
```cpp
FObject* parent = new FObject();
FObject* child = new FObject(parent);
parent->delChild(child);
```
If an FObject with a parent will remove from the hierarchy,
the destructor automatically deletes the object assignment from
its parent object. If a class object doesn't derive from FObject,
you must implement storage deallocation yourself.
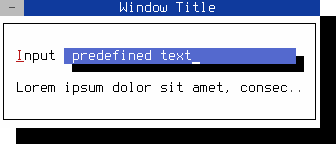
**File:** *memory.cpp*
```cpp
#include
using namespace finalcut;
int main (int argc, char* argv[])
{
FApplication app(argc, argv);
// The object dialog is managed by app
FDialog* dialog = new FDialog(&app);
dialog->setText ("Window Title");
dialog->setGeometry (FPoint{25, 5}, FSize{40, 8});
// The object input is managed by dialog
FLineEdit* input = new FLineEdit("predefined text", dialog);
input->setGeometry(FPoint{8, 2}, FSize{29, 1});
input->setLabelText (L"&Input");
// The object label is managed by dialog
FLabel* label = new FLabel ( "Lorem ipsum dolor sit amet, consectetur "
"adipiscing elit, sed do eiusmod tempor "
"incididunt ut labore et dolore magna aliqua."
, dialog );
label->setGeometry (FPoint{2, 4}, FSize{36, 1});
FWidget::setMainWidget(dialog);
dialog->show();
return app.exec();
}
```
Figure 4. FObject manages its child objects
*(Note: You can close the window with the mouse,
Shift+F10 or Ctrl+^)*
After entering the source code in *memory.cpp* you can compile
the above program with gcc:
```bash
g++ memory.cpp -o memory -O2 -lfinal
```
Event Processing
----------------
Calling `FApplication::exec()` starts the FINAL CUT main event loop.
While the event loop is running, the system checks all the time whether
an event has occurred and sends it to the application's currently focused
object. The events of the terminal, such as keystrokes, mouse actions, or
terminal size changing, are translated into `FEvent` objects, and sent them to
the active `FObject`. It is also possible to use `FApplication::sendEvent()`
or `FApplication::queueEvent()` to send a specific event to an object.
`FObject`-derived objects process incoming events by reimplementing the
virtual method `event()`. The `FObject` itself can only call its own events
`onTimer()` and `onUserEvent()` and ignores all other events. The
`FObject`-derived class `FWidget` also reimplements the `event()` method
to handle further events. `FWidget` calls the `FWidget::onKeyPress` method
when you press a key, or the `FWidget::onMouseDown` method when you click
a mouse button.
### Event handler reimplementation ###
An event in FINAL CUT is an object that inherits from the base class
`FEvent`. There are several event types, represented by an enum value.
For example, the method `FEvent::type()` returns the type
`fc::MouseDown_Event` when you press down a mouse button.
Some event types have data that cannot store in an `FEvent` object.
For example, a click event of the mouse must store which button is
triggered and where the mouse pointer was at that time. In classes derived
from `FEvent`, such as `FMouseEvent()`, we store this data.
Widgets get their events from the `event()` method inherited from FObject.
The implementation of `event()` in `FWidget` forwards the most common event
types to specific event handlers such as `FMouseEvent()`, `FKeyEvent()` or
`FResizeEvent()`. There are many other event types. You can create own event
types and send them to other objects and widgets.
### Available event types ###
```cpp
enum events
{
None_Event, // invalid event
KeyPress_Event, // key pressed
KeyUp_Event, // key released
KeyDown_Event, // key pressed
MouseDown_Event, // mouse button pressed
MouseUp_Event, // mouse button released
MouseDoubleClick_Event, // mouse button double click
MouseWheel_Event, // mouse wheel rolled
MouseMove_Event, // mouse move
FocusIn_Event, // focus in
FocusOut_Event, // focus out
ChildFocusIn_Event, // child focus in
ChildFocusOut_Event, // child focus out
WindowActive_Event, // activate window
WindowInactive_Event, // deactivate window
WindowRaised_Event, // raise window
WindowLowered_Event, // lower window
Accelerator_Event, // keyboard accelerator
Resize_Event, // terminal resize
Show_Event, // widget is shown
Hide_Event, // widget is hidden
Close_Event, // widget close
Timer_Event, // timer event occur
User_Event // user defined event
};
```
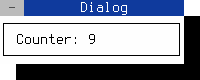
### Using a timer event ###
The following example starts a periodic timer that triggers an `FTimerEvent()`
every 100 ms. The virtual method `onTimer()` is then called each time in the
same dialog object.
**File:** *timer.cpp*
```cpp
#include
using namespace finalcut;
class dialogWidget : public FDialog
{
public:
explicit dialogWidget (FWidget* parent = nullptr)
: FDialog{parent}
{
setText ("Dialog");
setGeometry (FPoint{25, 5}, FSize{23, 4});
label.setGeometry (FPoint{1, 1}, FSize{10, 1});
label.setAlignment (fc::alignRight);
value.setGeometry (FPoint{11, 1}, FSize{10, 1});
id = addTimer(100);
}
private:
void onTimer (FTimerEvent* ev) override
{
if ( id == ev->getTimerId() && n < 9999999999 )
{
value.setNumber(n);
value.redraw();
n++;
}
}
FLabel label{"Counter: ", this};
FLabel value{"0", this};
long n{0};
int id{0};
};
int main (int argc, char* argv[])
{
FApplication app(argc, argv);
dialogWidget dialog(&app);
FWidget::setMainWidget(&dialog);
dialog.show();
return app.exec();
}
```
Figure 5. FObject::onTimer event handler
*(Note: You can close the window with the mouse,
Shift+F10 or Ctrl+^)*
After entering the source code in *timer.cpp* you can compile
the above program with gcc:
```bash
g++ timer.cpp -o timer -O2 -lfinal -std=c++11
```
### Using a user event ###
You can use the `FUserEvent()` to create a individual event and send it to a
specific object. If you want to create more than one user event, you can
specify an identification number (0 in the example below) to identify the
different events. This number can get later with `getUserId()`.
User events should be generated in the main event loop. For this purpose,
the class `FApplication` provides the virtual method
`processExternalUserEvent()`. This method can be overwritten in a derived
class and filled with user code.
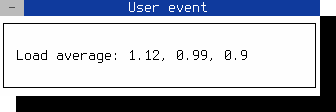
The following example reads the average system load and creates a user event
when a value changes. This event sends the current values to an `FLabel`
widget and displays them in the terminal.
**File:** *user-event.cpp*
```cpp
#include
#include
#define _BSD_SOURCE 1
#define _DEFAULT_SOURCE 1
using LoadAvg = double[3];
using namespace finalcut;
class extendedApplication : public FApplication
{
public:
extendedApplication (const int& argc, char* argv[])
: FApplication(argc, argv)
{ }
private:
void processExternalUserEvent() override
{
if ( getMainWidget() )
{
if ( getloadavg(load_avg, 3) < 0 )
FApplication::getLog()->error("Can't get load average values");
if ( last_avg[0] != load_avg[0]
|| last_avg[1] != load_avg[1]
|| last_avg[2] != load_avg[2] )
{
FUserEvent user_event(fc::User_Event, 0);
user_event.setData (load_avg);
FApplication::sendEvent (getMainWidget(), &user_event);
}
for (std::size_t i = 0; i < 3; i++)
last_avg[i] = load_avg[i];
}
}
// Data member
LoadAvg load_avg{}, last_avg{};
};
class dialogWidget final : public FDialog
{
public:
explicit dialogWidget (FWidget* parent = nullptr)
: FDialog{"User event", parent}
{
FDialog::setGeometry (FPoint{25, 5}, FSize{40, 6});
loadavg_label.setGeometry (FPoint{2, 2}, FSize{36, 1});
}
private:
void onUserEvent (FUserEvent* ev) override
{
const auto& lavg = ev->getData();
std::setlocale(LC_NUMERIC, "C");
loadavg_label.clear();
loadavg_label << "Load average: " << lavg[0] << ", "
<< lavg[1] << ", "
<< lavg[2] << " ";
loadavg_label.redraw();
}
FLabel loadavg_label{this};
};
int main (int argc, char* argv[])
{
extendedApplication app(argc, argv);
dialogWidget dialog(&app);
FWidget::setMainWidget(&dialog);
dialog.show();
return app.exec();
}
```
Figure 6. User event generation
*(Note: You can close the window with the mouse,
Shift+F10 or Ctrl+^)*
After entering the source code in *user-event.cpp* you can compile
the above program with gcc:
```bash
g++ user-event.cpp -o user-event -O2 -lfinal -std=c++11
```
Signals and Callbacks
---------------------
The callback mechanism is essential for developing applications with
FINAL CUT. Callback routines allow the programmer to connect different
objects (which do not need to know each other). Connected objects notify
each other when an action occurs in a widget. To uniquely identify a widget
action, it uses signal strings. For example, if an `FButton` object gets
clicked by a keyboard or mouse, it sends the string "clicked". A signal
handler explicitly provided by Widget, in the form of a callback function
or a callback method, can react to such a signal.
A callback function has no return value and can have various arguments:
```cpp
void cb_function (FWidget* w, int* i, double* d, ...)
{...}
```
The structure of a callback method is the same:
```cpp
void classname::cb_methode (FWidget* w, int* i, double* d, ...)
{...}
```
We use the `addCallback()` method of the `FWidget` class to connect
to other widget objects.
1. For calling functions or static methods via a pointer:
```cpp
template< typename Function
, typename FunctionPointer::type = nullptr
, typename... Args >
void FWidget::addCallback ( const FString& cb_signal
, Function&& cb_function
, Args&&... args)
{...}
```
2. For calling functions or static methods via a reference:
```cpp
template< typename Function
, typename FunctionReference::type = nullptr
, typename... Args >
void FWidget::addCallback ( const FString& cb_signal
, Function& cb_function
, Args&&... args)
{...}
```
3. For calling a member method of a specific instance:
```cpp
template< typename Object
, typename Function
, typename ObjectPointer